This month's HowTo outlines how to configure an automatic out of office message in both Outlook and Office 365. Note, both of these assume that you or your organisation is using either Microsoft Exchange or Microsoft Office 365. These methods will not work otherwise.
Setting up an Out of Office in Microsoft Outlook

Step 1: Click the "File" option in the top left
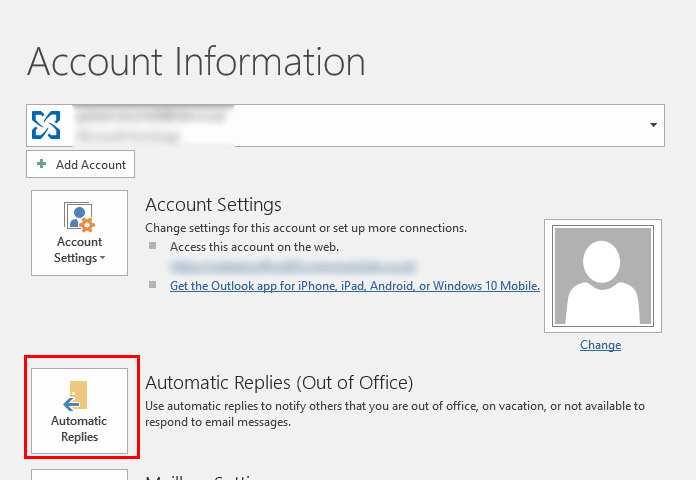
Step 2: Click the "Automatic Replies" option
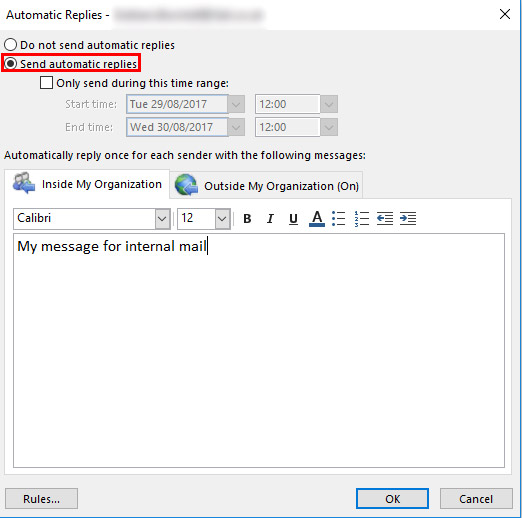
Step 3: The first tab shows the message that will automatically send to those inside your company.
Assuming you would like internal emails to receive the out of office, ensure the "Send Automatic Replies" option is picked.
If you would like this to apply instantly, leave the date options alone. If you would like the message to enable and disable itself at some point in the future, set the dates accordingly.
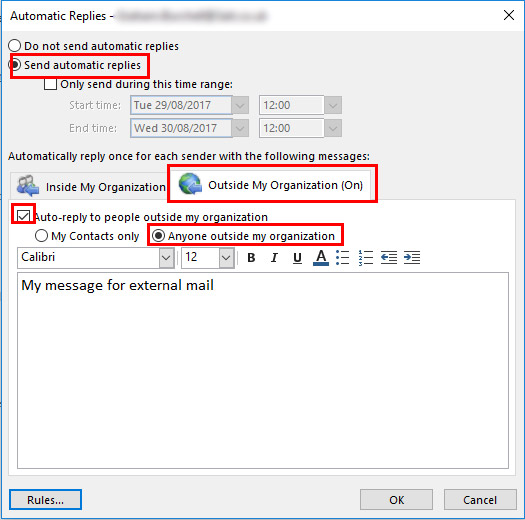
Step 4: Click the "Outside my Organisation" tab. The message here will be sent to senders outside of your company. You'll probably want the settings here to be the same as the previous tab, Make sure the settings just above the message are as highlighted.
Setting up an Out of Office in Microsoft Office 365
If you need to set an out of office but don't currently have access to Outlook, you can set it directly in Office 365
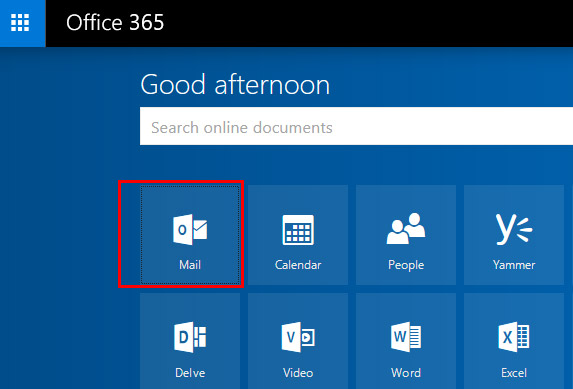
Step 1: One you've logged into Office 365, select the Mail option
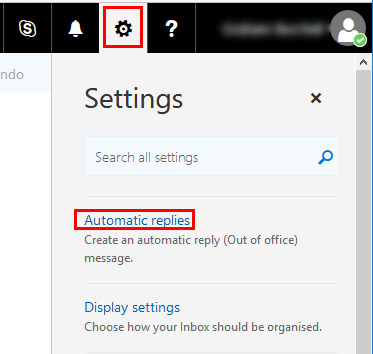
Step 2: Click the cog option in the top right and pick "Automatic replies"
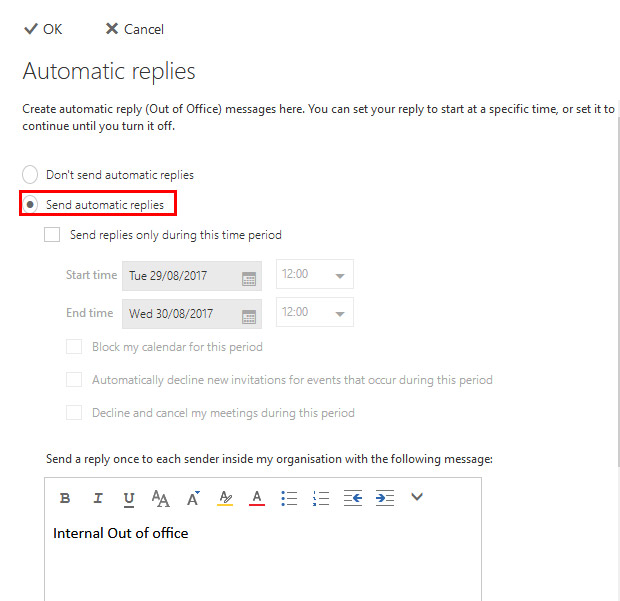
Step 3: You will then see a panel with options very similar to those listed for Outlook above. Set these in the same way, and click "OK" at the top.