Any Outlook users will likely be aware of the fact that, in addition to any external filtering of their mail, Outlook also has its own filtering system that will automatically filter some emails into junk. Equally, there may be mail you get you'd always like filtered into junk to declutter your inbox. The steps below will explain how to both block and allow certain addresses and / or whole domains.
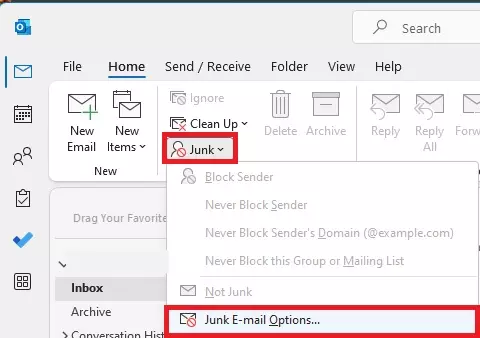
Step 1: With the "Home" tab open in Outlook, select the "Junk" dropdown, then pick "Junk Email Options"
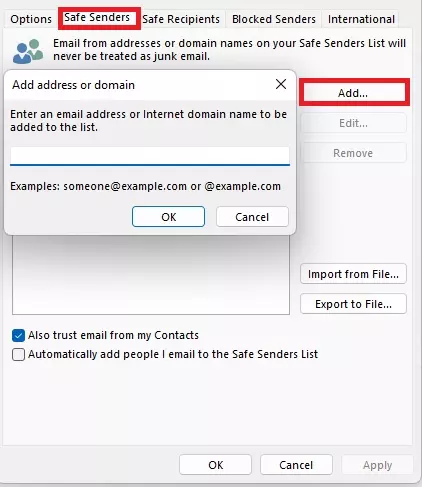
Step 2: If you want to prevent a specific email address from ever ending up in your junk folder, select "Safe Senders" and then "Add" and enter the address here. Note that you can also allow all emails from a certain domain as well if there's several senders from the same company that keep ending up in your junk. To do this, just start with the @ section of their email, ignoring the specific sender before that point.
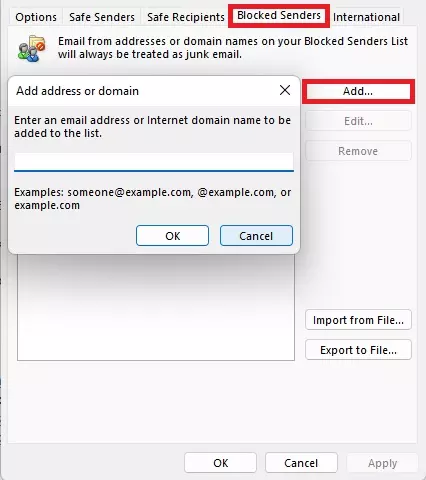
Step 3: Similarly, if you'd like a certain address or domain to always be filtered into your junk, use the "Blocked Senders" option and add specific addresses or whole @ domains here.
There's a couple of things worth noting here. It's always worth being wary of emails, even from "Safe" senders. Scammers do use the knowledge that certain senders may be whitelisted to try and bypass your ususal due diligence for something you might find in your junk email. Additionally, these rules only apply to emails that have made it as far as your inbox. If any filtering has occurred further up the chain before this point, adding addresses here will make no difference.