Photo manipulation has been in the news a lot recently. Although this is often generically referred to as "Photoshopping", few people actually use that actual app to touch up their snaps. Microsoft have now added a new erase tool to the Photos app that comes with Windows that allows you to remove anything you like from your picture. Let's take a look at it in action.

Step 1: Open the photo you want to remove elements from in the Photos app. If this doesn't happen by default when you double click, you can right click + "Open With" Photos. We've picked a snowy scene here.
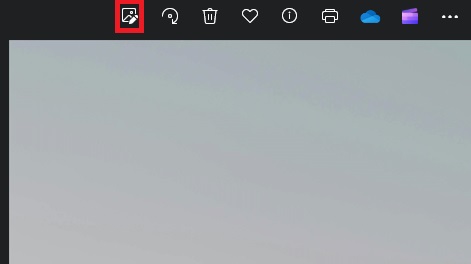
Step 2: Click the "Edit" button.
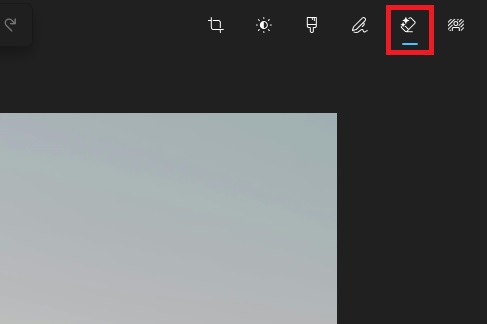
Step 3: Click the "Erase" Button.

Step 4: Pick an element to remove from your photo and roughly cover the element. It doesn't need to be precise, but ensure you cover all of it without including any other distinctive elements.

Step 5: It's as if it were never there! If it's just one annoyance in the background ruining an otherwise perfect photo, that should be it. But let's go a bit further here.

Step 6: We've repeated exactly the same process here on all other elements other than the guy in the photo. Finally, let's take this to its logical extension...

Step 7: With one final stroke of the erase tool, we're left with a well trodden but otherwise empty snowscape.