As an IT support and development company, there's often occasions where someone is trying to describe an obscure problem to us in words that it would be much easier to show in a video. We have remote assistance tools that we use in many of these cases, but there may well be occasions that it's easier just to send a video clip of the problem. Microsoft have recently added the ability to record video in their screenshot snipping tool. This HowTo will show you how this works.
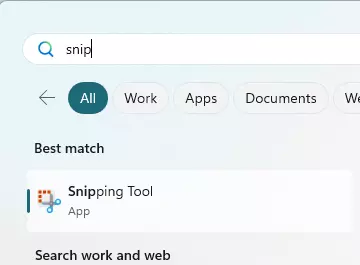
Step 1: Click the Windows taskbar icon and search "Snip", which should bring up the Snipping Tool for you to open.
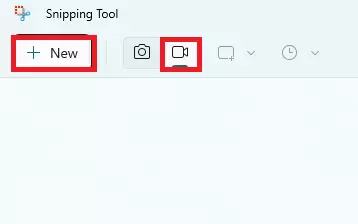
Step 2: Ensure the Video option is selected and then click "New"

Step 3: You can then draw a box around the area of the screen you'd like to include in the video. Ideally, you want to make this as small as possible, but also large enough to fully demonstrate the thing you're trying to record. The larger the area included, the larger the video file size will be.
Then, just hit the record button. You'll be given a countdown and then you can start going through whatever process is necessary to get across whatever it is you're trying to demostrate. Note that it is possible to pause the recording if there's irrelevant but necessary steps needed, then you can unpause again when you get to the important bit. Once you're done, hit the stop button.
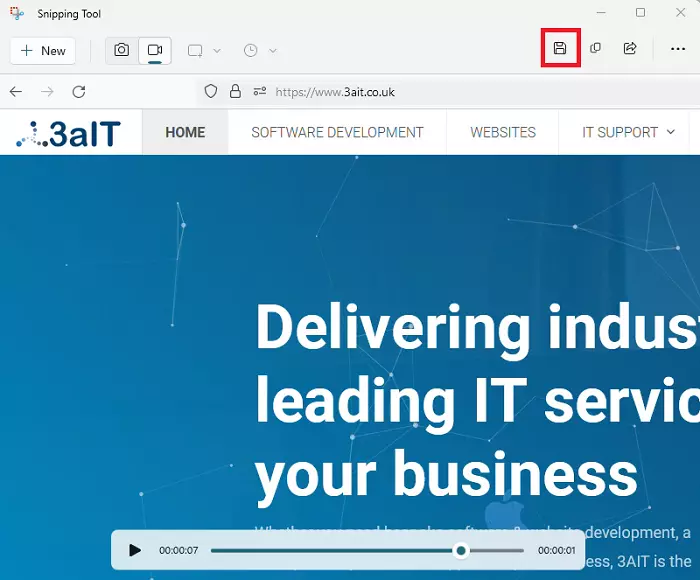
Step 4: The video should then appear for you to review. If you're happy with it, just hit the save button and save it somewhere appropriate.
Note that depending on the size and length of the video, you may find it's too big to email. If this is the case, you might want to use a file sharing service or to share the file on OneDrive, Google Files or similar if that option is open to you.