Unless you never leave your PC alone, you will probably have noticed that it switches the screen off after a while, and then goes to sleep a while after that. Windows provides the tools to set how and when this happens if you're not happy with the default. Maybe you want your machine to lock much sooner after leaving your desk. Maybe you want to make sure it never goes to sleep. Either way, this guide should help you find the settings to do this.

Step 1: Start typing "Power" into the search box and select "Power & sleep settings". You can also get here by clicking the settings cog on the start menu, then System, then "Power & Sleep".
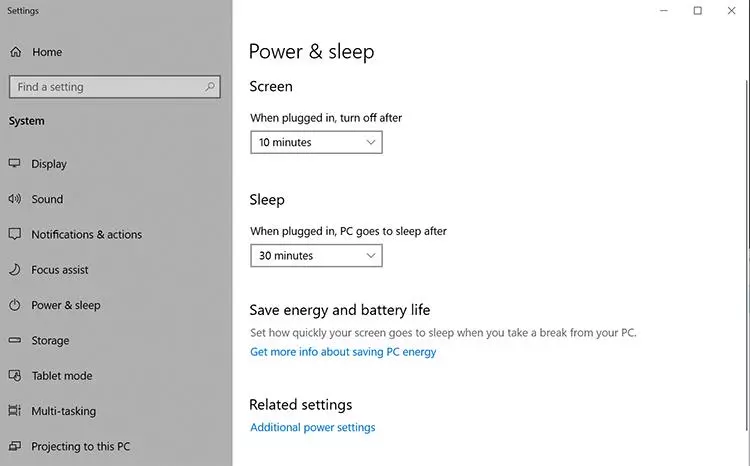
Step 2: You will be presented with a series of dropdowns to let you set the length of time the device waits before turning the screen off and going to sleep. If you're using a laptop or tablet, you may see extra options here for different lengths of time when the device is running off the battery. If the values you've set are fine in all cases, you're done! However, it is possible to define different settings for different scenarios so you can easily switch between them. If you want to do that, select "Additional power settings" on this page and proceed to Step 3.
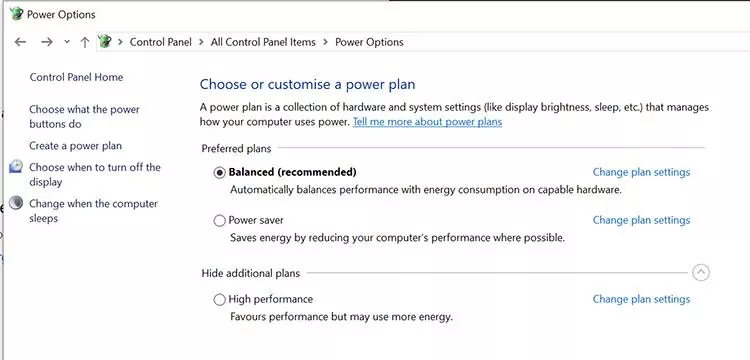
Step 3: This page lets you switch between more than one "Power plan", and lets you change the settings of each to suit your requirements. This facility is provided in case you use your device in different scenarios that require different lengths of time before things start turning themselves off. To check the values of each of the defined plans, press the "Change plan settings" next to it.
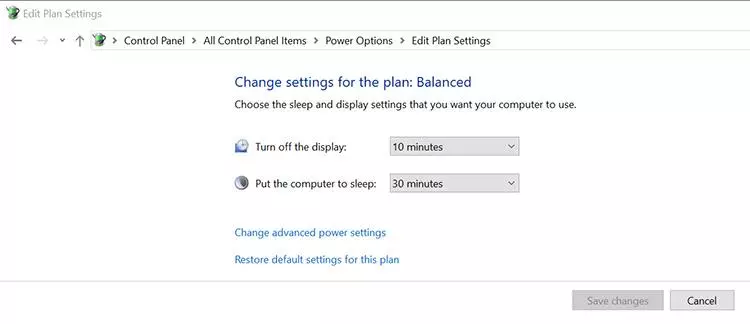
Step 4: You will be presented with the same options that you will have seen on the first page. You can set these as required for each of the plans and then switch between them as necessary