A nice quick and simple HowTo this month, but one that may make a big difference depending on what time of day you tend to use your PC. You may have seen one of the many news stories in recent months that blue light from monitors can be harmful to your health and interrupt your sleep patterns. What you may not know is that Windows 10 now includes a feature that will remove the blue light from the screen at certain times of day. This is very simple to switch on and off as required, and can also be set to a schedule.
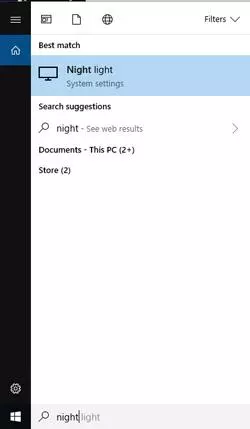
First, go to the seach bar in the bottom left and start typing "Night". You should see the Night Light option appear. Click on this (you can also get to this screen via the settings panel by going to System -> Display then clicking the Night Light link).
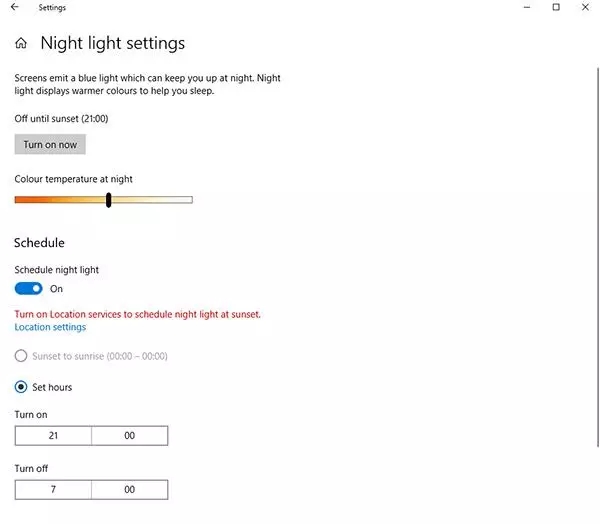
You will then see a panel with a few options. The first of these at the top just lets you switch the mode on and off, and then set the amount of blue light removed beneath that (the further from white, the better). Unless you only use your machine late at night very occasionally, you'll probably want to schedule this mode automatically rather than switching it on and off manually. To do this, flip the schedule toggle to on. If you have allowed Windows to use your location, it's possible to synchronise it with sunrise and sunset wherever you are. It's also possible to manually define the on / off time. And that's all there is to it!
As an aside, it's also possible to achieve the same thing on mobile devices. Apple devices have a "Night Shift" mode that can be switched on. Some Android devices also have a similar option out of the box, or you can install an app like Lux to do the same thing.